There are lots of monsters in Monster Hunter World.
The beasts are varied not only visually, but you’ll need different tactics for each encounter. Each one interacts with its environment in a different way and has different strengths and weaknesses.
Given the huge nature of the areas and all of the interconnected chaos happening within them, I wouldn’t be surprised if long down the track we’re still finding out interesting things you can do.
So here’s a guide to all the boss-level monsters in the game, in order of appearance. We’re still in early stages, but there are some very specific things you can do to help yourself out in the field.
We’ll keep this post updated after launch and keep adding to it as better strategies come to light.
Great Jagras
This giant lizard gets so hungry it’ll walk up to other beasts almost the same size and swallow them whole. This is actually used as a fighting tactic as well.
Once there’s a massive meal inside that scaley tummy, the Great Jagras has a different moveset. It can roll sideways somewhat, doing more damage than usual. It’s possible to do enough damage to its gut to force it to vomit its prey back up, getting rid of its advantages.
It will sometimes run to its nest where smaller Jagras creatures reside, but at most they’re a small annoyance.
Kulu-Ya-Ku
This is a smaller, bird-like creature with the ability to pick up objects and use them as tools. This will usually manifest itself as picking up a rock to smash you with.
In addition to doing more damage, this is troublesome because any frontal attack in the vicinity of the rock’s hitbox will be deflected back at you.
Force it to drop its rock by hitting it with your slinger. It’ll also run if it sees one of its natural enemies.
It rarely drops its head for you to hit it. It’s weak to water-infused elements but you’ll encounter this enemy so early you’re probably using the default weapons. Not to worry — it’s an easy monster to defeat. Even if you just bash on its stronger backside.
Pukei-Pukei
Poison is the name of the game for the first flier you’ll encounter in Monster Hunter World. Its tongue has quite a range, but it telegraphs these attacks very obviously before it whipping it about. If you see that tongue coming out, either get out of the 180 degrees in front of it, or time your roll perfectly.
From time to time, you’ll see the Pukei-Pukei licking the plants on a nearby hill. It does this to store scatternuts, which it will very soon be spitting at you coated in poison.
Its neck bulges up when it’s full (as in the image above), and after a few poison-based area-of-effect attacks it should be safe to engage again. If you’re not keen to fight the Pukei-Pukei, it should run away at the sight of a larger beast. Just make sure you don’t then start an unwanted altercation with a bigger problem.
Rathian
This beast is only spotted briefly before first encountering the Barroth. It happens during an escort quest, and you probably don’t want to abandon your wagon to engage the Rathian.
This is a flier with very strong legs and a venomous tail. The game warns us to approach this monster with fire-resistant armour. Arguably its poison is the more dangerous, yet subtle killer.
Get to know its backflip move (which it sometimes does in quick succession), as it packs a double-whammy of heavy physical damage and poison. Targeting its tail can actually cut it off, which will reduce its ability to poison you.
Barroth
No prizes for guessing what the strong part of this hard-headed behemoth is, but you might be surprised to hear its weak point is its hands (and tail). Though it can be a little tricky to hit those hands sometimes as it’s swinging its rocky head about.
The Barroth likes to cover itself in mud, which it uses as both armour and projectile. Perhaps counterintuitively, the solution for this in Monster Hunter World is water-based weapons. These will soften up the mud and make sure your weapon is connecting to actual monster hide.
It’s crucial to note that the Barroth’s vulnerabilities completely switch when it’s covered in mud. Fire absolutely thrashes it in its normal state, whereas water is useless. Once it’s muddy, it’s a case of vice versa.
The slinger can also be used to knock mud off, though this seems like a less efficient method. Depending on where the Barroth is, the majority of your fight might take place before it ever reaches its muddy home and has a lie down.
Jyuratodus
Preferring the watery swamps in the Wildspire Wastes, the Jyuratodus will come at you like Jaws.
These fights will be slightly tricky as you won’t want to engage while standing in the water, so you’ll stick to small islands dotted around its swamp. The Jyuratodus will spit wads of muck at you which take up valuable real estate on your little island of safety.
If you’re caught in the muck, its sets you up perfectly for any of its melee attacks. Just remember it’s far better to roll into water than muck!
Take the above info about mud armour and water weapons, and multiply it by ten. Then double it. This creature is all about the mud, and funnily enough loves to clash with its mud brother, Barroth. Water weapons thrash it when it’s muddy (which is a lot), and do nothing when it’s dry. The reverse is true for Thunder damage.
There are also pieces of gear that can assist with movement in sludge. Look for the Muck Resistance skill, which both the Jyura Mail and Barroth Coil have. A few victories against a Jyuratodus can set you up with some decent low-tier defence armour that enables free movement through water and muck.
Tobi-Kadachi
With its fast attacks and stun capability, it’s likely the Tobi-Kadachi will be many players’ first death in Monster Hunter World. There’s no way around the fact that you’re going to have to learn this monster’s attack animations and roll at the right times.
Tobi-Kadachi has some attacks that carry electricity, and you’ll be able to see when it’s charged up by the crackling energy around it. Once you’re affected by electricity, you’re much more vulnerable to stunlock.
Give it two electrified hits on you, and you’re basically giving it two more for free.
That’s a bad situation to be in, but it’s avoidable. Its electricity is generated from static as it quickly moves around from spot to spot. If you can stop it from moving around so much, you’ll prevent it from charging up. Consider shock or pitfall traps.
Ranged poison weapons work well because it can often be hard to catch. Might as well have its health ticking down in the process.
There’s no one element on the monster you can break to reduce its electric capabilities. But you can stun it, trap it or otherwise paralyse it.
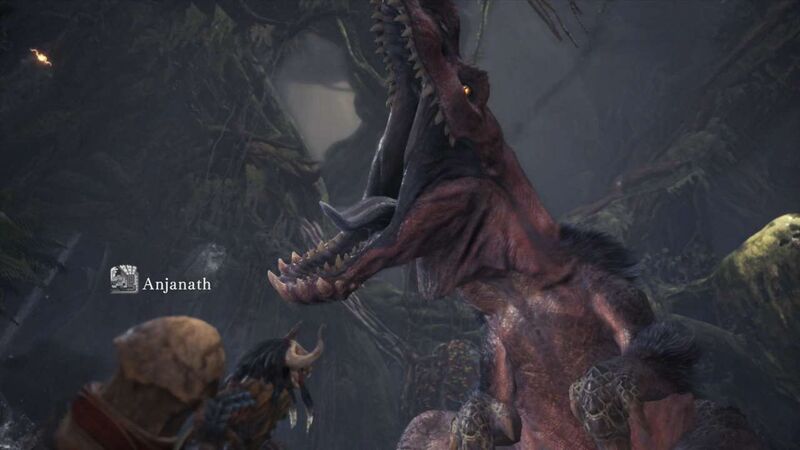
Anjanath
Resembling a T-Rex, this hyper-aggressive carnivore has a fearsome maw. Definitely roll to the side when you see it gearing up for either a snap of its jaw or a long-range jump attack.
It’ll also take a swipe at you with its hind legs if it notices you around its flank, but these do very minimal damage. If you’re about to deal some big-number damage and notice this attack will hit you right afterwards. it’s actually worth the trade.
In the later stages of the fight, the Anjanath‘s throat will bulge and it will start breathing a very painful stream of fire. Sometimes the hurtbox of this fiery area of effect can be wonky — it might not look like you’re in it, but you could still get it. Moving around to its flank is the best idea.
The bulging organ in its throat is where the fire comes from, so focusing attack on that will cripple its pyrotechnic abilities. This might be harder for ground-based melee classes, but the Anjanath actually lowers its head quite a bit.
Tzitzi-Ya-Ku
This one-trick pony is a lot of fun.
The Tzitzi-Ya-Ku isn’t the most challenging boss in Monster Hunter World, but you’ll need to kill it before the commission can progress.
Its state-of-the-art photophore on its head blinds enemies in roughly a 130 degree forward arc. There’s a significant wind-up to this, so once you see its head lighting up, roll around to its flank.
It’s natural when healing to try to gain a bit of distance. Resist this urge. Medium range or more is where it becomes impossible to roll sideways and avoid the flash. The Tzitzi-Ya-Ku always follows up a successful flashbomb with a heavy attack.
The head is its only breakable part and weak point. But to be honest, it won’t matter much if you’re bashing away at its backside. It’s not the toughest enemy.
Breaking the head will however limit the range of its blind ability.
Paolumu
The Paolumu is as flammable as it is fat.
This monster will puff up with air and use it for both flight and air-based attacks that knock you back. It’s most dangerous while airbourne, and it can be hard to hit in this state.
Deflate the beast by either keeping your distance to bait its air attacks, or bashing its gassy gullet as much as possible. Once it’s on all fours again, that’s your opportunity.
Everything is breakable, but its only real weak point is its head.
If you’re after an armour set that isn’t in the “large and spikey” family, the Paolumu’s snow gear is a fun, fluffy alternative.
Great Girros
You first encounter this monster when venturing into the Rotten Vale to set up camp. But your actual hunt for the Great Girros will come later.
Truth be told, the Great Girros is an easy monster to defeat by itself. But unlike the Great Jagras or Jyuratodus, the minions around this monster are a serious roadblock. A few attacks from a minor Girros and you’re paralysed — a sitting duck for the Great Girros’ attacks.
Fortunately, the little Girros is a coward. Kill one of them and the rest will scurry away, giving you some one-on-one time with the big baddie. Even the sight of a Girros corpse you killed a moment ago should send a wandering lizard running.
The Great Girros’ parts will be necessary if you want to build a paralysis weapon, which come in handy for the next few fights.
If you’re having trouble with the effluvial gas that fills the Great Girros’ lair, armour made from nearby Hornetaur bugs can cancel it out.
Radobaan
There are a few key things to remember when fighting the Radobaan.
First, its roll attack is insidiously slow at first. But sometimes it comes straight back with a much faster roll. Slow, then fast. Always be ready for that second roll.
Second, remove its armour and then hammer away. It’s one of the rare monsters weak in its hind legs, and the Radobaan will often wave its head around ground level, just waiting to be smacked.
If you’re game, a well-timed attack while it’s rolling can knock it down.
It also tends to hang out in areas with lots of Hornetaurs, which are one of the most annoying insects in Monster Hunter World. Their jumps can interrupt your attacks, and they don’t stop spawning.
Legiana
In Monster Hunter World, the Legiana is king of the skies around the Coral Highlands. It prevents the commission from expanding into the Rotten Vale in any meaningful way until you deal with the problem.
If you’ve eaten before the fight (always eat before the fight), the stamina issues that its ice causes shouldn’t be too much of an issue. But the direct damage from its projectile attacks is. If you see it twirl around and turn white, get ready to roll.
As kind of the skies, the Legiana will tousle with other flying creatures it comes across. But don’t rely on this to help you in a fight. It can dominate a Paolumu without suffering a scratch.
The more you break parts on this monster, the slower it should be — making the final stages of the fight a lot easier than the first.
Odogaron
The Odogaron can be a tough fight. It wanders around the Rotten Vale, which means you’ll occasionally attract a Radobaan or Great Jirros as well. The Odogaron can be vulnerable to the Great Jirros’ paralysis attack, but you’d be lucky to capitalise on that without the Great Jirros and its minions ignoring you.
If you’ve crafted a weapon from the parts of the Great Jirros or Legiana, then the respective paralysis and ice damage could help you out a lot here.
It’ll pretty much come straight at you all the time, which makes it a good candidate for traps. If it’s in a rage, then you’ll have to focus on evasion for a while. Afterwards, when it’s tired, go nuts.
You’ll spend a lot of time avoiding that gaping maw. As you should. If you’re in front of it though, expect a mid-speed claw attack that quickly causes bleeding. You’ll have to sheathe your weapon and crouch for a period to stop the bleeding.
Having a Palico with a taunt ability can help at times like this, since the Odogaron isn’t one to just give you space. The ghillie suit is also a good option.
As the Odogaron hangs out where effluvial gas is common, it might help to don the chestpiece made from Hornetaurs, which cancels out the health drain.
Rathalos
Get ready for equal parts fire and poison. The Rathalos can sometimes create a bit of distance with a quick, fiery huff’n’puff on the ground in an arc in front of it.
The real challenge here though, is the fact that the Rathalos likes to stay in the air.
Flash pods work great here. Sometimes targeting the Rathalos’ head first helps — then wait for a moment with less head movement, and let ‘er rip. The blind effect will ground it, and it will usually stay grounded for the next string of attacks.
If you’ve been mining every mineral deposit you see, you’ll have more than enough to ascend a normal damage weapon as high as it can go for your level. Unless you’ve got a thunder or paralysis weapon, normal physical damage is probably the way to go.
If you can manage to sever the beast’s tail as well, that will negate all of the poison on its tail-whip attack. You’ll still want to avoid the physical damage, but it’s no longer a double whammy.
Diablos
It’s a biggie, that Diablos.
Screamer pods can create enough noise to force it to the surface when it tries to attack you from below. You can also bait his charge into one of the wildspires, giving you a moment of free damage.
After each one of its attacks, its recovery is slow enough to allow for one or two attacks before you might need to start rolling away. Try to get away before he screams or starts charging again.
The Diablos’ head is quite intimidating, but don’t be afraid to give it a whack, especially if you need those horns for crafting. Remember: With larger beasts like these, sometimes the best place to be is right under them.
If you managed to farm enough Legiana materials to make an ice weapon, that’ll serve you well here. But a fast water sword will do great as well, or as usual, hammer swings to the face are always great. Hitting its hind legs might be a bit of a waste of time, though. Those thing are quite tough.
Bazelgeuse
Wow, what an annoying monster.
The worst thing about Bazelgeuse isn’t fighting Bazelgeuse. It’s how it’ll show up during every other fight and create chaos. Monsters are supposed to fight each other, but much of the time it’ll feel like they’re ganging up on you. Try a dung pod to the face to make it run away. You might get lucky.
This flying wyvern likes to drop explosive scales on the ground to create safe spaces for itself. These blasts give it lots of combos and stuns. It’s highly frustrating.
There are a couple of things I’d highly recommend. The nature of the explosive scales means you have to pick your moment and do hit-and-run attacks. For this reason, melee warriors should pick a weapon with fast attacks. Get in, get two hits off, then leave before the inevitable blasts start.
Next, it’s unadvisable to keep engaging Bazelgeuse when it’s enraged. You can easily tell this because its scales glow red. In this mode, dropped scales will explode straight away without being “activated” by Bazelgeuse’s touch. Keep your distance until it tires itself out. It doesn’t stay enraged for long.
Unfortunately, severing its tail doesn’t get rid of much scale growth. The game recommends knocking it down to take out its scale organs. I’d instead focus on disabling it as much as possible and hitting weak points. Use all your tricks like flash pods, ghillie suit, bombs and traps.
Dodogama
This monster is the easiest of the late game beasts. Just keep in mind that even with full fire resist gear, tanking two full shots of its fiery spit can kill you.
You’ll see when the Dodogama goes up to the wall and starts eating rock, much like the Pukei-Pukei would lick plants. With this material in its mouth, it’s preparing some spit — but its head is also highly susceptible to attack. Go HAM on its jaw and the resulting explosion will create even more openings.
Other than that, the biggest thing you have to worry about in this fight is another elder dragon that might wander in. Dung pods.
Lavasioth
Reminiscent of the Jyuratodus, this monster will use lava for armour instead of mud. The main difference here is that water damage is always effective against it.
This lava softens as it swims, and hardens as it dries. When it comes fresh out of lava, do as much damage as you can. After it’s been up for a while with dried armour, you do so little damage it’s not even worth attacking it.
A good way to tell where to attack is its red points. Just like a good ol’ Zelda game. If it’s red, make it dead.
With sufficient fire resist you should be able to tank through the constant damage done by the lava pools it leaves around the place. Just be sure to keep an eye on it.
Pink Rathian
Rathian’s got a brand new bag.
This subspecies is a bit more difficult to deal with. Its new tail swing attack is more horizontal, and does more poison damage. A very well timed backwards roll can get you to safety.
Pink Rathian also likes to do a low, slow swoop on you with its wings spread. The entirety of its wingspan can damage you, and its wideness means sideways rolls probably won’t cut it. Luckily, it’s just the edges of the wings that hurt. Come into contact with the middle of the wings, and you’re fine. So a forward roll into the wings will work.
You won’t have much luck bashing on its legs, but I found it hangs its head low enough to take a few hits.
Uragaan
Whoever designed the Uragaan’s animations is a bad, bad person. This is Dark Souls levels of sneaky animations.
The Uragaan’s main weak point is its undercarriage — and it’s very adept at protecting it. Not only will it drop little bombs wherever it rolls or flings a limb, it can also do an area-of-effect burst of fire or sleep gas. This punishes anyone trying to slice away at that vulnerable tummy.
A couple of animations you need to watch out for. The “powering up for an AoE” is a must. When it rolls towards you, be aware that its tail will loop around to catch you after your roll. When it flings its tail in a circle, remain vigilant for its tail looping around one more time to catch you. It’s super sneaky.
Deadliest is when it rolls at you from point blank range. It’ll roll around in a circle to come at you a second time. It’s crucial here to not double-roll — that’ll put you in the path of its circle. Just one roll to the side will put you inside the circle and in prime position to attack when it finishes.
The Uragaan also likes to fight in areas that have some advantages for you. Be it herbs, or flashflies, or mini cliffs to jump off and mount it. You should be using all of these. If you’re anywhere near it when it slams the ground with its jaw, try to roll right on the impact. You’ll avoid the resulting stun from ground tremors.
Nergigante
This one stands among the most fearsome bosses in Monster Hunter World.
Imagine the Radobaan’s boney exoskeleton, and all its advantages. Now imagine it can repair that armour so quickly it regenerated multiple times within a fight. Add flying. Add a brutal dive bomb attack.
That’s a tough monster to hunt.
Nergigante’s spikes on different parts of its body need to constantly be kept in check. If they get hard enough, your weapons will actually bounce off them. On the other hand, when the spikes are down, that’s the best time to do damage to that body part.
The nature of these spikes mean you need to be aggressive. Whereas other monsters might let you go slower and pick your moment, you need to constantly be on top of the Nergigante’s spike growth.
It’ll appear a few times throughout the game, hampering the commission’s efforts. But there’ll be ample time to get your revenge.
Deviljho
One of the first DLC monsters, and a returning monster of old. Veteran monster hunters will remember Deviljho. This one can even swing smaller monsters around in its jaw, using them as a weapon.
You think the Anjanath was tough? Meet its older cousin. Just as fiery, just as angry, and similar tiny arms to lure you into a false sense of security. Just because it can’t scratch its back doesn’t mean it can’t take on a high-level hunter.
It deals Dragon and Dragonblight damage, and is weak to Thunder and Dragon damage. All ailments affect it with a medium effectiveness. You’ll be able to make the Dragonproof Mantle after completing its mission, which increases Dragon damage and resistance.
Kulve Taroth
A bit of a unique monster in both nature and implementation, Kulve Taroth is a huge encounter that will take 16 players to take on. It takes four groups of four in the gathering hub to start the Kulve Taroth Siege quest. They’ll then gather tracks and break parts off the monster, contributing to the server-wide quest.
Its outer coating of metal is a bit of a problem. When the gold coating is present, it’s vulnerable to Thunder damage. After the coating is removed, it’s vulnerable to ice damage.
The gold plating on its head is the weakest, and you’d do well to break its horns as early as possible.
More to come
We’ll be updating this post as time goes on.
Stay tuned for more monsters and more details on all their strengths and weaknesses!
